
The Everything Guide to Roasting Your Own Coffee Beans
Roasting your own coffee beans is a simple, albeit messy, process. It can be a modern experience: Purchase a roaster, set it up on your table or counter, and pour in your beans. It can be a primitive experience: Roast your beans over an open flame in a cast iron skillet. Or it can be somewhere in the middle: Roast them in your oven or on your grill, use a popcorn popper or a Whirley Pop (or Dutch oven), or attempt the manly Dog Bowl method.
However you choose to roast your beans, know this: Even reading about it can feel like an addiction waiting to happen, so be prepared to stock up on green coffee beans and dedicate a wooden spoon solely to the coffee roasting process.
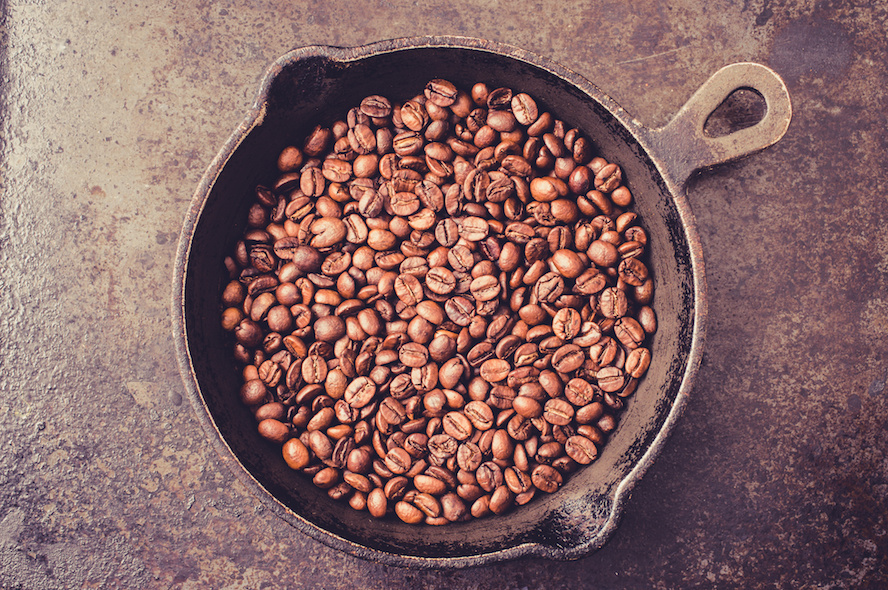
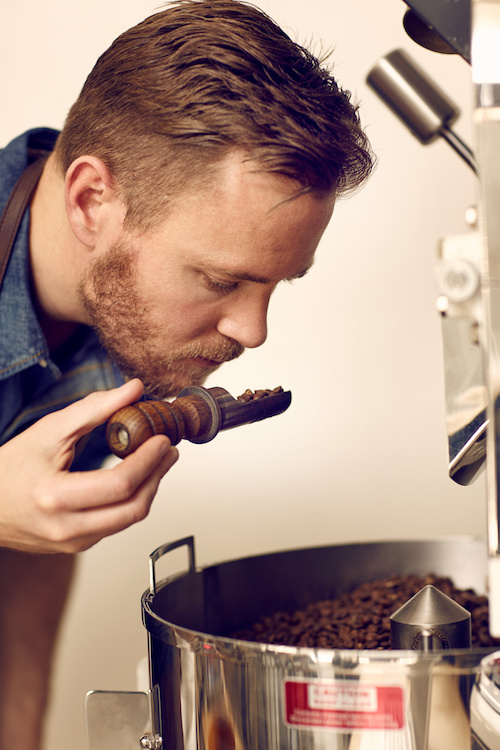
Pan Roasting Green Coffee Beans
Pan roasting is the Every Person’s Method. You CAN try this at home!
We recommend using a camp stove or fire pit outside. Coffee bean roasting is a smelly, messy process. While it smells heavenly on that first day. A week later, your house may smell like a stale Starbucks. And no one wants that! So, we highly recommend opening your windows and doors while roasting, or else finding a cooking space outside.
First, gather your supplies. Second, read through the steps. Third, measure your beans and follow the instructions to.the.letter.
Supplies List
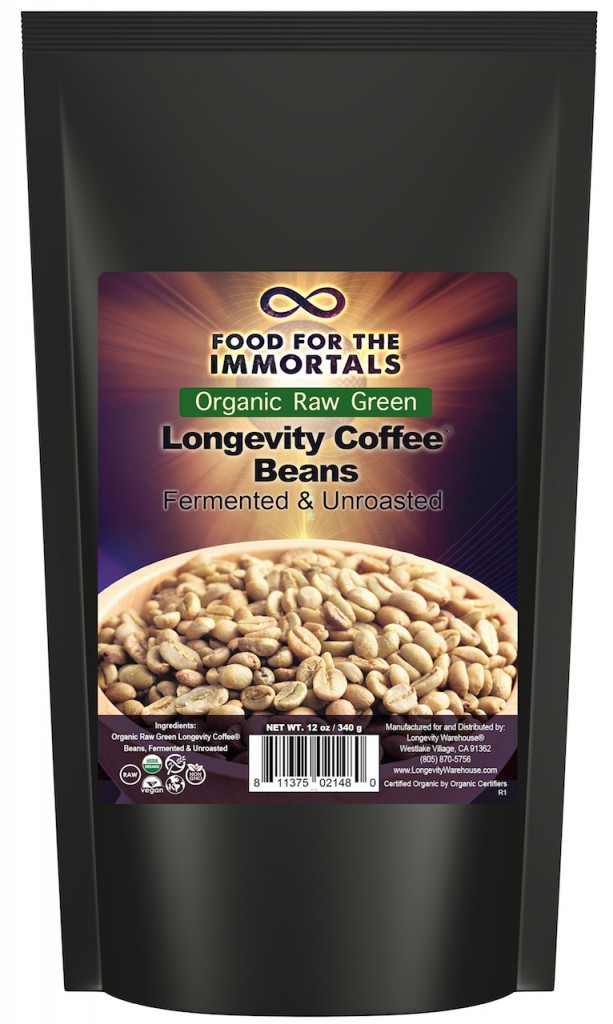
• 4 oz. Organic Raw Green Longevity Coffee™ Beans (start small to get the hang of it)
• 6-8” Cast Iron Skillet (if you don’t have cast iron, use the heaviest-grade skillet you own)
• 1 Wooden Spoon (which will never be the same again)
• Oven Mitts or Hot Pads
• 2 Metal Colanders (with medium holes), chilled ahead of time in the freezer
• Airtight Storage Container
Instructions
1. Set your burner to Medium heat.
2. Pour your green coffee beans into the pan. Some home roasters recommend heating the pan for a minute or two before pouring the coffee beans in, but you don’t have to.
3. Allow the beans to simmer for 3-4 minutes, until you begin to smell the tantalizing aroma of coffee.
4. Begin stirring slowly and rhythmically, and Don’t Stop!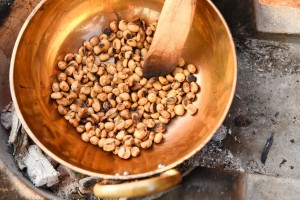
5. Continue stirring for 10 minutes for a light roast, 15 minutes for a medium roast, and 20-30 minutes for the dark roasts. Do NOT roast your beans longer than 30 minutes.
6. Remove the pan from the heat and pour the hot beans into one of the chilled colanders.
7. Using an oven mitt, transfer the beans back and forth from one colander to the other for a few minutes.
8. When you can touch the beans without your oven mitt on, you’re free to grind them right away. Or you can let them vent off (CO2) for 4-24 hours (recommended for darker roasts).
9. Prepare your coffee the usual way, and expect a taste explosion in your mouth.
Of Note
What’s missing from these instructions is the subtle and not-so-subtle dynamism of the home coffee roasting process. Here, I will attempt to fill in the gaps for you. If I do my job well, you’ll be hunting in your cupboards for a cast iron pan before you read the rest of my article. While that will thrill me to no end, please come back and finish reading. Later on, I share very important tips, tricks, and information that will transform a simple experiment into a home roasting extravaganza.
Filling in the Gaps: Coffee Beans
Certainly, you can roast any old green coffee beans. You could go down to your local coffee roasters and see if they’ll sell you some raw beans from their stash. Or you could order a bunch of low-grade raw beans from the Internet. And it might be wise to start with some low-grade coffee beans for your first attempts, as there is definitely a learning curve involved.
However, and this is a big however: If you want the full explosion, not only of flavor but of longevity-boosting power, you will want to begin with the Best Beans Ever.
Experts agree, the key ingredient to home roasting is high-quality green coffee beans.  And quality doesn’t get any higher than hand-picked from the Valley of Longevity in Ecuador. Our Food for the Immortals® coffee plants grow wild in the jungles of South America. They’re fed by natural spring water and harvested by hand in the wild! Only the most robust and mineral-rich beans are selected. From seed to harvest, Longevity Coffee™ is handled only by experts within our company.
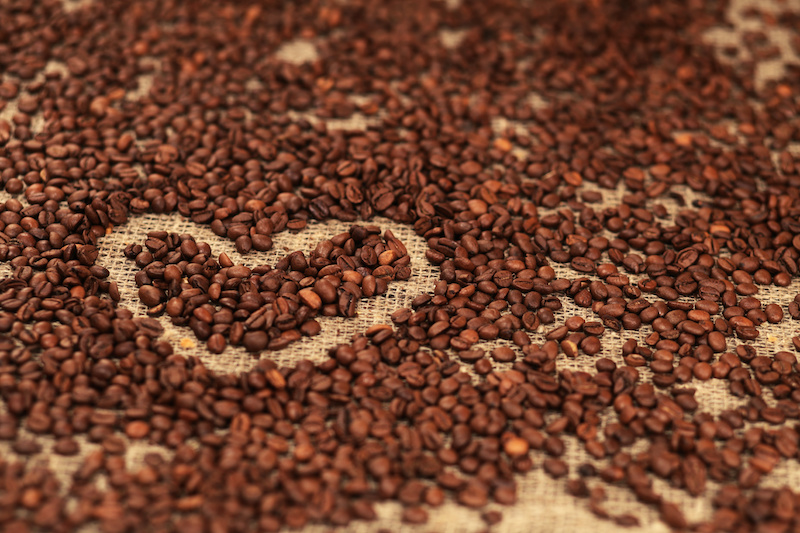
Did you know that coffee beans are not really beans? They’re actually the seeds of the Coffea plant. The Coffea plant blossoms in dainty white flowers. These white flowers produce clusters of green berries that ripen to red. Called cherries in the industry, these gorgeous fruits are home to one or two coveted coffee seeds. Like blueberries, coffee cherries can bear both ripe and unripe fruits next to each other. This is why hand-picking is not only recommended, but often necessary. It takes an astonishing 2000 cherries to produce one pound of green coffee beans!!
Now, coffee beans are super high in antioxidants, those free-radical scavengers that keep us youthful and vital! You’ll notice in step 8 that some experts recommend venting off the beans after roasting. This is a step recommended in particular for darker roasts. However, if you want the full antioxidant benefit, lighter roasts and immediate use after roasting will give you the most bang for your buck! If you grind your beans finely, the steeping time will be less, as well.
That being said, experts say that your Best Cup of Coffee Ever (in terms of flavor) will be the one you make with grounds from a bean roasted about 24 hours prior to grinding. Again, this is a matter of flavor and not of nutrition. The Best Nutrition Ever comes immediately after roasting and cooling!
Filling in the Gaps: Know The Signs of Transformation
Coffee beans experience several stages of transformation during the roasting process. These stages must be observed throughout the roasting process by using three of your senses: Sight, Smell, and Sound.
Sight
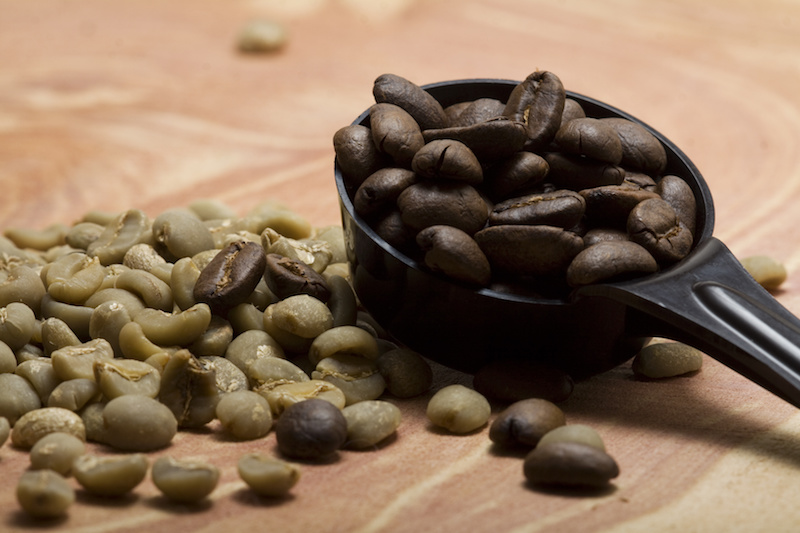
With your eyes you’ll be observe the color changes your beans go through as they internally combust. Cold raw beans are green. As they heat up, their hue changes to yellow, then to tan, then to light brown, and then to darker and darker brown.
Not only does their color change, but so does their texture. Raw green beans are highly textured. As they transform, the texture increases so that you’ll begin to see dark, deep creases in the surface. In addition, the beans will begin to expand, as well. By the end of the roasting process, they may have doubled in size! As the roasting time increases, the surface texture decreases, so that the darkest roast might be absolutely smooth. The darker roasts will also develop an oily sheen, as the oils from within are expressed to the outer layer.
You will also observe with your eyes the release of the silverskin (also called hull or chaff). The longer the beans roast, the more chaff you’ll see develop around the beans. It is the chaff that makes home roasting a messy process.
Smell
With your nose, you’ll smell the progression from no aroma (green), to a delicious array of scents building in and around your roasting space. As the beans heat up, the aromatic compounds, oils, and solids are literally burned out of the coffee. This results in that magnificent coffee smell. In fact, unless you’ve roast your own coffee at home, you don’t know the glory of coffee in terms of its aroma.
In the arena of professional roasting, aroma is considered a waste product. By the time you brew your coffee, you’re only smelling the essence of the roasted bean. Most of the aroma-producing solubles have been eradicated by the roasting process long before you pour water over the grounds.
That being said, the roasting process is still best done out of doors. Along with the delectable aroma comes a frightful amount of smoke. The darker the roast, the thicker the smoke. While this smoke smells good on that first day, as it dissipates and seeps into every porous surface, it goes stale. And there are few smells out there more foul than stale coffee!
Sound
This is where coffee roasting gets exciting! With your ears you will hear a number of unusual sounds throughout the process. Those who’ve taken the time to rate the different home roasting methods label the cast iron method as the quietest. That being said, the sounds that tell you where you’re at in the roasting process become the most pronounced with this method, since the rest of the process is so meditative.
Here’s how it will happen: You’re going along, stirring your beans, watching them transform. You can hear the beans sizzling a bit, and you see a fair amount of steam. You’re breathing deeply, taking in as much of that heavenly aroma as possible, when suddenly: CRACK!!
The First Crack takes place about three to five minutes after the beans have been roasting. They’ve changed from green to yellow to tan, and now they’re heading toward brown. And they begin to emit steam.
You’ll hear one of a number of possible First Crack sounds: (1) You might hear a popping sound like the sound of popcorn in the microwave, (2) you might hear a sound like walnuts cracking, or (3) you might hear one loud, startling crack.
The sound is produced by the expulsion of moisture from inside the bean. It may grow in momentum, sounding like a bag of microwave popcorn at its peak of popping. Eventually it subsides, and for a half minute or slightly more, you’ll return to your meditative stirring.
Don’t let the rhythm lull you too much, or the impending Second Crack will cause you to jump! Most home roasting experts say the Second Crack is louder and more startling. You might hear (1) a snapping sound like Rice Krispies crackling in milk, (2) an electrical sparking sound, (3) a volatile second crack which will blow the chaff off the bean, (4) a sound like a pencil snapping, (5) a sound like fingernails drumming on a metal surface, (5) a sound like bubbles popping in the air, or (5) a rolling and continuous popping, snapping, crackling sound that subsides after half a minute.
No matter what you see, hear, or smell, keep your senses attuned fully to the process. This not only aids your learning curve, but it also ensures that your beans will make a good cup of coffee when you’ve finished roasting them.
Filling in the Gaps: Know Bean Chemistry
Knowing what’s happening chemically to the beans adds intrigue to the process, particularly when it comes to the First and Second Cracks. It is precisely these chemical reactions, created by the direct application of heat to the coffee bean, that transforms the beans from an unpalatable seed into a delectable drink that transports a person to the ethereal realm with just one sip.
As the beans grow hotter and hotter, certain chemical reactions begin to take place within the seed structure. Basically, the heat is slowly and methodically sucking the oxygen out of the bean and destroying the organic material within it. The scientific term for this process is a pyrolytic reaction. Google’s definition makes it clear that this is an irreversible process. Once that green bean turns brown, there’s no going back!
The first evidence of this irreversible process happens at the moment of the First Crack. At this point, the beans reach 390-410 degrees F. The water and CO2 fracture within the seed, releasing a host of steam and causing the bean to expand. The hull begins to flake off at this stage, as well.
Soon after, the beans heat to 425-435 degrees F. At this point, the bitter astringency associated with green coffee beans has dissipated. Drinking a cup of coffee made from beans roasted to this point is akin to drinking a smooth cup of tea.
As the beans approach the onset of the Second Crack, they’ve heated to an internal temperature of 435-455 degrees F. At some point within this temperature range, the second pyrolytic reaction takes place, sparking the Second Crack. Here, the cellular matrix of the bean has ruptured, and the oils within the cell chambers begin to leak out to the surface of the beans, giving them a resplendent oily sheen.
At 450-460 degrees F, the flavor subtleties of the coffee beans’ origins are eclipsed by the actual roasting flavors. Hotter yet (460-470 degrees F), and the sugars have completely degraded. The bean structure is turning into carbon (charcoal), and the seed has lost internal mass, causing it to expand further. At 470-480 degrees F, you don’t have coffee anymore. Don’t let it get this far, or you’ll have a lump of charcoal and a roomful of foul smoke.
Coffee roasting is a learned skill, requiring practice before perfection. Because it’s a matter of minutes before you go from delicious French Roast to charcoal water, we recommend experimenting at first with small amounts of raw coffee beans.
Other Roasting Methods
There are so many ways to roast at home. I just want to touch on a few of the more user-friendly, starter methods. For more advanced options, a quick Internet search will turn open the floodgates to a full-on addiction!

Oven Roasting
Supplies
• Disposable, Vented Aluminum Bake Tin
• 4-16 oz. Green Coffee Beans (depending on your skill level)
• Hot Mitts or Pads
• Colander with Medium-Sized Holes (chilled in the freezer ahead of time)
Instructions
1. Preheat oven to 450 degrees F, and turn on your exhaust fan (and open the doors and windows, too). A convection oven is ideal, but not necessary.
2. Pull apart the sides of the baking tin and flatten it out smooth.
3. Spread the green coffee beans across the tin in a single layer.
4. Roast in the oven for 3-5 minutes.
5. Pull the pan out carefully and give it a good shake, ensuring that the beans flip over and change position.
6. Roast for another 3-5 minutes.
7. Pull the beans out and take them outside.
8. Pour them quickly into the colander and shake them vigorously to cool them and remove the chaff.
9. Rest the beans, or grind them immediately for maximum antioxidant benefit.
Of Note:
These instructions result in a Light Roast. If you’d like a darker roast, more than 12 minutes in the oven, then turn your oven up to a higher temperature. The darker the roast, the more important the resting stage is to allow the CO2 to vent off. A note of caution: Darker roasts = heavier smoke. You may not want to do heavy roasting inside your home oven.

Air Popper Method
Supplies
• The Right Kind of Popcorn Popper* (You won’t be able to make popcorn in it after this!)
• A Large Bowl
• 2 Chilled Colanders
• Oven Mitts for Safety
Instructions
1. Set your popcorn popper in a well-ventilated area, preferably outdoors or in the garage.
2. Make sure you have strong overhead light so you can use your sense of sight to maximum effect.
3. Keep your supplies within arm’s reach so you can keep your eyes on the prize.
4. Measure your green coffee beans and pour them into your popper. (Follow the ounce recommendations of your individual popper. Use no more than the maximum recommended quantity of popcorn kernels.)
5. Secure the plastic hood and butter dish in place, and turn on the machine.
6. After one minute, lift out the butter dish so you can keep an eye on the color transformations.
7. Use your nose and eyes to tell you what stage you’re at.
8. Remember to be vigilant, and remember that your beans will continue roasting after they’re removed from the popper, until they have fully cooled.
9. When your beans are one shade lighter than the color you desire, turn off the machine and pour them out into one of your chilled colanders.
10. Toss them between the two colanders, or swiftly stir them with a wooden spoon. Remember that the chaff is going to flow out of the colander, so do this outside where you can make a mess.
11. Immediately grind your first cup of coffee, placing the remaining roasted beans in an airtight container.
Of Note:
Do your research ahead of time. Not all popcorn poppers work for roasting coffee beans. A quick Internet search will give you all the details you need to find the one that will work best for your purposes. Also, you will never be able to pop popcorn in your popper again, so make sure you have a dedicated coffee bean popper!
Whirley Pop Method (Or Dutch Oven Method)
Supplies
• 4-8 oz. Raw Green Coffee Beans
• Whirley Pop Popcorn Pan or a heavy-duty Dutch Oven (with a lid that can be partially opened)
• Stove Top or Camp Stove
• Oven Mitts
• Wooden Spoon
• 2 Chilled Colanders
Instructions
1. Measure your beans and pour them into the pan.
2. Turn your stove to slightly below Medium heat.
3. Turn the crank (or stir with a wooden spoon if you’re using a Dutch Oven) at a steady and sustainable pace. You must keep the beans constantly moving throughout the process.
4. For best results and temperature control, keep the lid closed throughout. Use your ears and nose to tell you which stage of the process you’re at. Some experts say it’s okay to lift the lid once in awhile, but it’s better if you don’t.
5. When your beans are a shade lighter than your desired hue, remove them from the heat and pour them into a chilled colander.
6. Toss them between the two colanders, or swiftly stir them with a wooden spoon. Remember that the chaff is going to flow out of the colander, so do this outside where you can make a mess.
7. Immediately grind your first cup of coffee, placing the remaining roasted beans in an airtight container.
An Overview & Final Thoughts
If you’re not already searching for a cast iron pan or your dusty old popcorn popper, then I’d like to share some final words and lists with you. The folks at Serious Eats ask the valid question: “Is coffee roasting more like knitting or [performing] appendectomies?”
In other words, can you really do this unassisted at home?
Yes, we believe you can. But will you?
Points to Consider:
• Home coffee roasting is time consuming and can be messy. The whole process takes more than 30 minutes from roast to brew, and for more than half that time you’re either stirring, tossing, or grinding your beans.
• It’s addictive! You might burn your first batch, or you might under-roast it. But you’ll be hooked, and you’ll want to do it again. And again. And again. Because it’s fun, meditative, smells so damn good, and you’ll impress your friends (at least in your fantasies).
• Cafe coffee will never taste good again! The subtle variations in flavor, the antioxidant burst in that first fresh cup of coffee, the smoothness, the control you’ll have over each and every taste experience. Even your best brewed cafe coffees will pale in comparison!
• Coffee at home is the perfect delivery vehicle for herbal nutrition. Skip those paltry, sugary additives, and add a dose of Maca, Lucuma, Cacao!!!**, vanilla beans. You can add them in during roasting to infuse a subtle essence, or you can stir them into your steaming mug of java!
• It’s definitely going to be cheaper than buying a latte on the go! A pound of premium green coffee beans may cost you the same as a pound of roasted beans, but by addicting yourself to the roasting process, you will steer away from those latte stands in a heartbeat. And there’s no need for fancy equipment. A pan, a spoon, a colander, and an oven mitt are all you really need! This not only improves your bottom line, but it may improve your waistline and your face lines, as well!

Roasting Details
The Stages
1. Yellowing
2. Expulsion of Steam
3. Tanning
4. Browning
5. First Crack
6. Caramelization
7. Second Crack
8. Darkening Roast
9. Obliterated
Post-Roasting Cooling Methods
For more about these methods and how to employ them, I suggest a quick online search.
1. Chilled Colander (the method I mentioned throughout the article)
2. Cookie Sheet
3. Fan & Metal Mesh DIY Method
4. Misting with a Spray Bottle of Water
Roast Types
• Light Roast (10 min on heat): Pull the beans off the heat right before, or just after, the First Crack (415-425 degrees 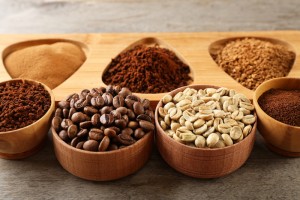 F). The flavor may be sour or astringent still. For best flavor, remove them from the heat after the last detectable sound of the First Crack. Your coffee will resemble a smooth tea.
• Medium Roast (15 min total): Pull the beans off the heat 10 seconds to 1 minute after the last pop of the First Crack (425-435 degrees F). Flavor will be smoother.
• Sumatra Roast (20 min total): Pull the beans off the heat just as the Second Crack is about to happen (435-445 degrees F).
• Full Roast (25 min total): Pull the beans off just as you begin to hear the first snaps of the Second Crack (445-450 degrees F). At this point, the roast flavors will overpower the origin flavors, creating a perfect harmony between the two flavor profiles. This is the recommended roast for espresso.
• Vienna Roast (30 min total): Pull the beans off after the Second Crack ends (460-470 degrees F). The aromatic compounds and oils have burned off completely, leaving a thinner body and lighter color.
• Never leave your beans on the heat more than 2 minutes past the Second Crack, or it will burn.
Storage and Use
• Store your green, unroasted coffee beans in a cool dry place at room temperature, preferably in its original airtight packaging. Flavor and nutrition will remain potent for between 6 months to a year, as long as it’s stored in an airtight container.
• Do not expose your beans, raw or roasted, to direct sunlight. Do not store raw beans in the fridge, where the moisture level is too high, or in the freezer, where the air is too dry.
• Once your coffee beans are roasted, only store them in the freezer if you do not plan to use them within the next 7-10 days.
• You can allow your roasted beans to cool uncovered for up to 12 hours. After this, store them in a cool dry place in an airtight container out of direct sunlight.
• Use your roasted beans within 14 days of roasting them for best results.
• Roasted coffee peaks on the 3rd or 4th day after roasting, once all the CO2 has gassed off.
And there you have it — Everything You Need to Know about starting your own home roasting routine. Give us a shout if you try this at home!
by Angela Magnotti Andrews
**At Longevity Warehouse, we source only wild jungle grown cacao from heirloom trees in Ecuador. To read more, click here.
Thanks for such an informative article! Would this work with a small camp stove (such as the Solo Stove Lite- approx 4 inches wide), even though only the center of an 8-inch pan would be over the flame?